How to install openVPN
How to install OpenVPN on Ubuntu 20.04
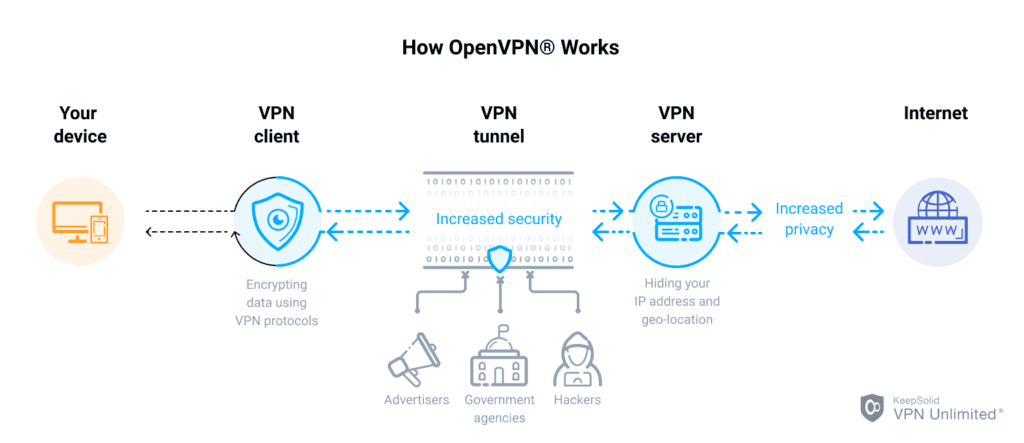
What is OpenVPN?
OpenVPN is a completely free open-source VPN program. OpenVPN is also considered the best solution for those who want a safe and secure connection between two networks.
OpenVPN allows secure point-to-point connections in routed or bridged configurations and remote access facilities. It uses a custom security protocol based on SSL/TLS to establish an encrypted connection on the Internet. And currently, at AZDIGI, the techniques have been deployed and used for the most security.

Steps to install OpenVPN
Requirements:
- Linux server (In this article, I will install on Ubuntu version 20.04)
- Public IP
To install OpenVPN, follow these steps:
Step 1: Update the system
Before installing, I will update the system packages to the new version.
sudo apt update
sudo apt upgrade
Step 2: Download and install OpenVPN from the script
You download the script, then authorize and run the installation.
wget https://git.io/vpn -O openvpn-ubuntu-install.sh
chmod -v +x openvpn-ubuntu-install.sh
bash openvpn-ubuntu-install.sh
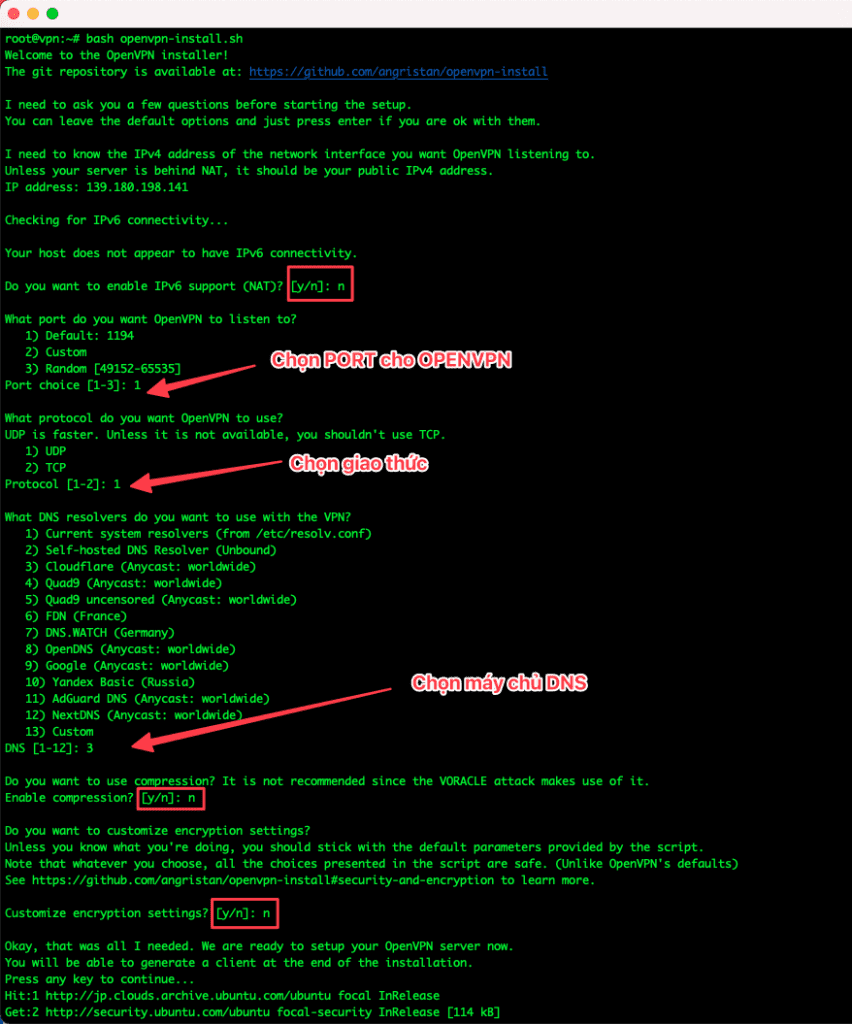
Then you will be asked to enter some information, including:
- Client name: Set the user name for the OpenVPN account
- Select configuration protection
- 1) Add a passwordless client: Don’t set a password for the configuration file
- 2) Use a password for the client: Set a password
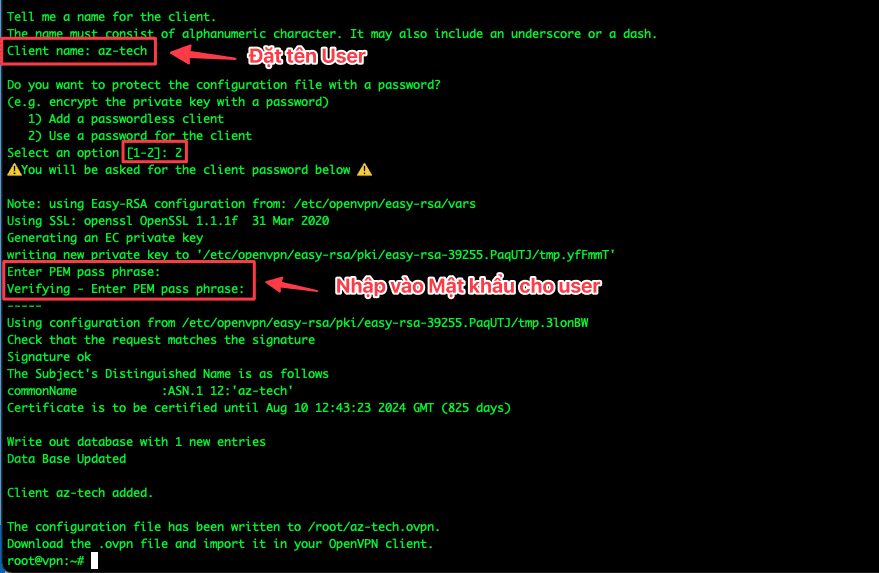
To create a new account, run the bash openvpn-ubuntu-install.sh command again and set it up as in step 3 and there are menus like:
- 1) Add a new user
- 2) Revoke existing user
- 3) Remove OpenVPN
- 4) Exit
root@vpn:~# bash openvpn-install.sh
Welcome to OpenVPN-install!
The git repository is available at: https://github.com/angristan/openvpn-install

It looks like OpenVPN is already installed.

What do you want to do?
   1) Add a new user
   2) Revoke existing user
   3) Remove OpenVPN
   4) Exit
Select an option [1-4]: 1
Step 3: Download the configuration file to your computer
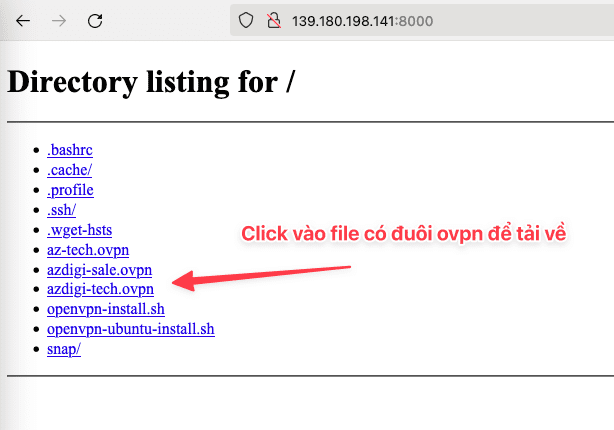
With step 2, you can connect and use OpenVPN. However, I will write this extra step to help you download the configuration file directly from the browser to the client’s computer. To do this, please run the following command:
root@vpn:~# cd /root && python3 -m http.server
Serving HTTP on 0.0.0.0 port 8000 (http://0.0.0.0:8000/) ...
Then you access the browser, enter server-ip:8000 to view the configuration file and download it. If you do not have access to port 8000, then the port is not open on the firewall system. Please refer to the following article to open it:
Step 4: Set up & use OpenVPN
To use a VPN on your computer or mobile phone, you must install VPN Client to connect. Some software for each operating system, such as:
1. Set up using OpenVPN on your computer
- Windows: OpenVPN Client for Windows
- macOS: TunnelBlick or OpenVPN
1.1 Configuring OpenVPN on Windows
After installing the OpenVPN app on Windows and downloading the *.opvn file, copy this file and move it to C:\program File\OpenVPN\config
1.2 Configuring OpenVPN on MacOS
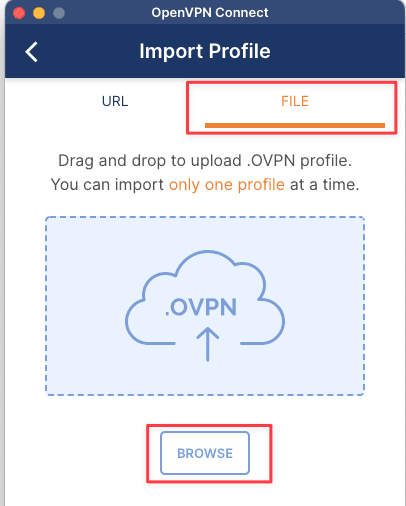
With the configuration on MacOS, I use an app called OpenVPN to set up a VPN. You select the + icon to add a new account.

Next, you click FILE => BROWSE => .opvn file. .opvn
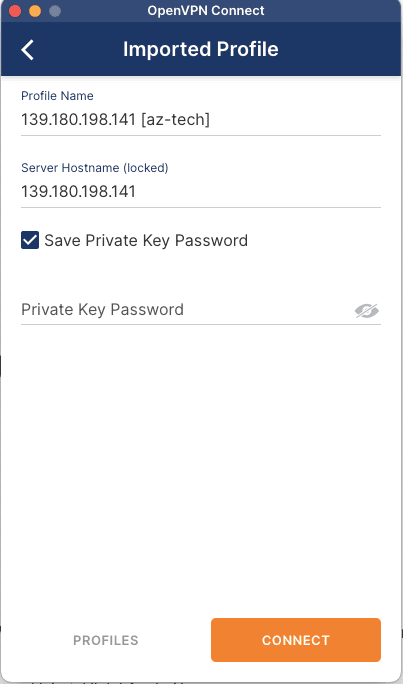
Then you press CONNECT button. If asked for a password, enter the password you created in the first step.
2. Set up & use OpenVPN on mobile
OpenVPN has support on mobile devices as well. To download, please visit the corresponding link below:
- iOS: OpenVPN Connect for iOS
- Android: OpenVPN Connect for Android
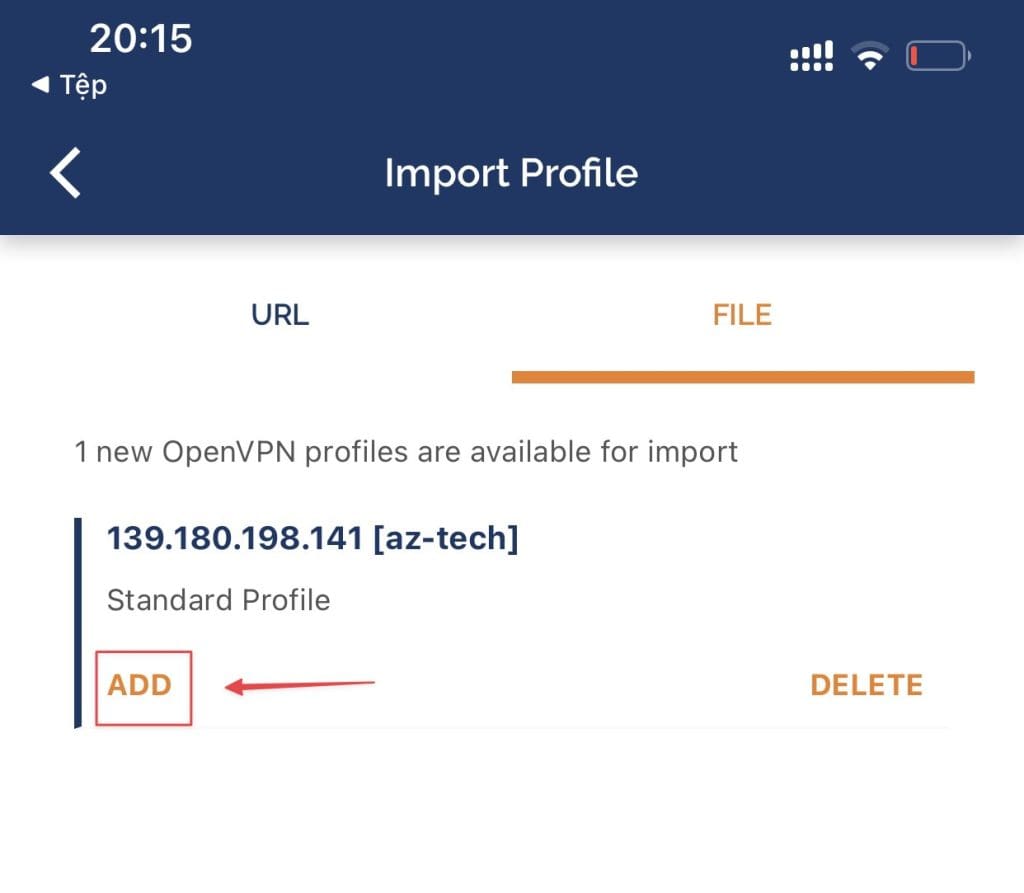
Please download the .opvn file to your mobile device => open this file with the installed OpenVPN application.

Then you click ADD to add the file.
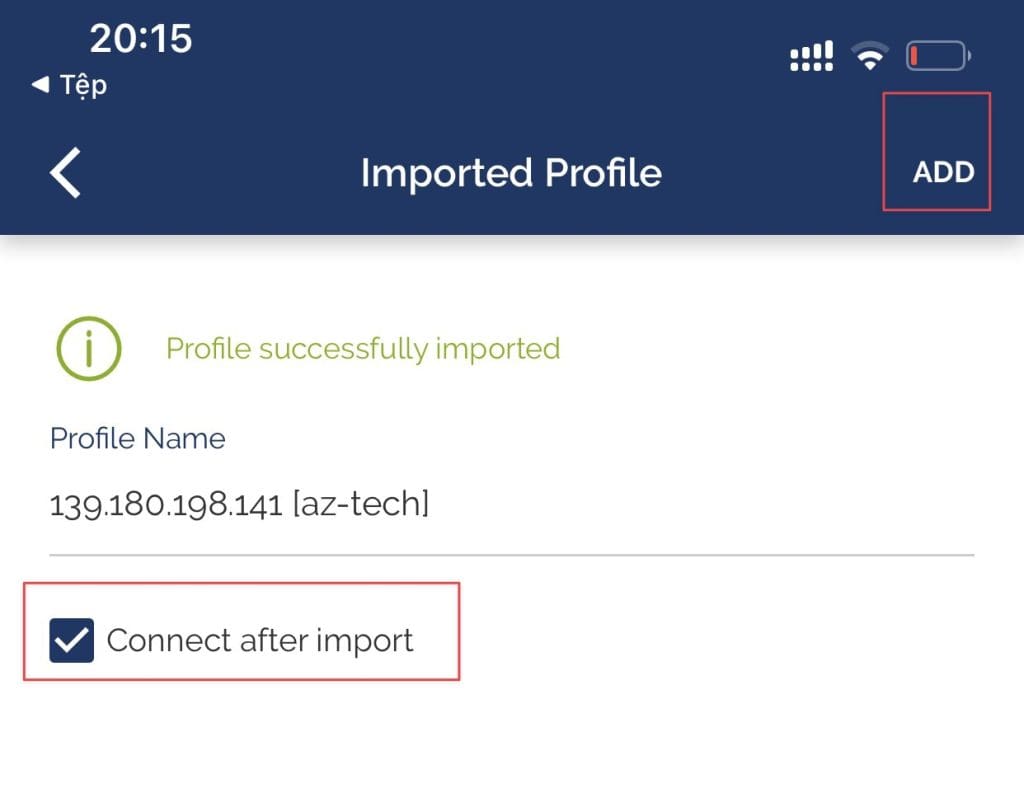
Next, select Connect after import => ADD.
And below is the result after accessing:


Comments
Post a Comment